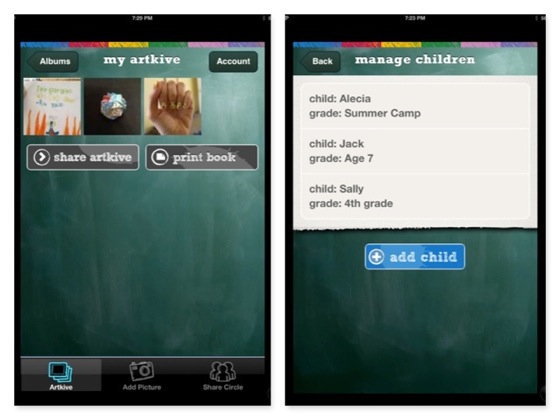
Here's a nice looking app for your mobile device that stores and organizes artwork. I photograph the kids artwork already, but I think I might need to check this out as well.
Every year I try to do several self portraits of the kids. It is a good way to get observation as well as some art history involved. Click here for previous self portraits
This week, with my 4th-6th graders, I did a project inspired by contemporary American artist Chuck Close, who is known for his larger than life portraits using a grid and a pixelated look. He had learning disabilites and also had a medical condition that confined him to a wheelchair.
So, to begin with, I photographed each student and went home and applied a 12x18 grid over the photo.
With this gridded picture of themselves, they had to make a grid on a 12x18 piece of paper. This proved to be just as difficult as anything. Thankfully, the kids are learning about grids and math factors with their teacher Ms. Kinser, so this reinforced it. Getting this right was a challenge and tested their patience and left/right brain sensibility.
Once the tears had been wiped away from the grid, we went on to transferring the major lines of their face. My goal had been to get to color the first class, but the intro, grid and starting line work took my allotted hour, so I will update next time!
I am very happy with how many of the kids really took to this. Even the ones who struggled, put in a good fight, and the end result of the PROCESS will make their brains stronger.
Ah, the smell of apples in September and the pitter-patter of Kindergartners! A fall classic is apple stamping, but I gave it a bit of a twist this year by having them assemble it into a tree. My K-1 class only has 30 minutes and this was a non-stop lesson with three different paint stations, three different parts and three colors that had to rotate 12 kids through.
I cut apples in half and then collected leaves (I used cherry leaves since apple leaves are not very flat)
The apple station was red, leaf station green and the bark station was paper bags that they used brushes to explore texture on.
The kids really got into the stamping and art really feels like art when they a re slopping the paint around! Its amazing to see the reactions to the young kids exploring texture and printing.
In the next lesson, after paint had dried, we cut out the apples, leaves and the trunks were cut from tracings of their arm and hand.
This year, we are having a school-wide focus on North America, and American history in several grades. In music, the kids were learning 'America the Beautiful,' so I decided to do something that tied into the song in art class.
The K-1 class did one picture that was their choice of imagery from the first two stanzas...all the most common phrases:
O beautiful for spacious skies,
For amber waves of grain,
For purple mountain majesties
Above the fruited plain!
America! America!
God shed his grace on thee
And crown thy good with brotherhood
From sea to shining sea!
I showed the kids some imagery from a book that had some wonderful illustrations, and we discussed spacious, amber, grain, etc. The technique we used was torn paper. I do this so they don't get to worked up about drawing or cutting exact shapes. My educational goals in this lesson were to teach the kids to use color, shape and texture. Tearing (with some cutting) is a good way to get some interesting shapes. Then the kids were to think about their arrangement before gluing and try to use layering with background and foreground objects to create depth. They did a good jobs for kids this young!
Its already Fall! And I still haven't posted many of my Springtime projects! Bad teacher;-( Well that will allow me to sprinkle them during the Fall when I am inevitably busy.
Our little school has about 40 kids, with a large K-2 contingent, so that allows me to do more focused projects with the older 3-6th kids and lots of fun crafty projects with the young ones! This year I'm going to focus on American artists as well as American themes. Paired with a good dose of theory and technique.
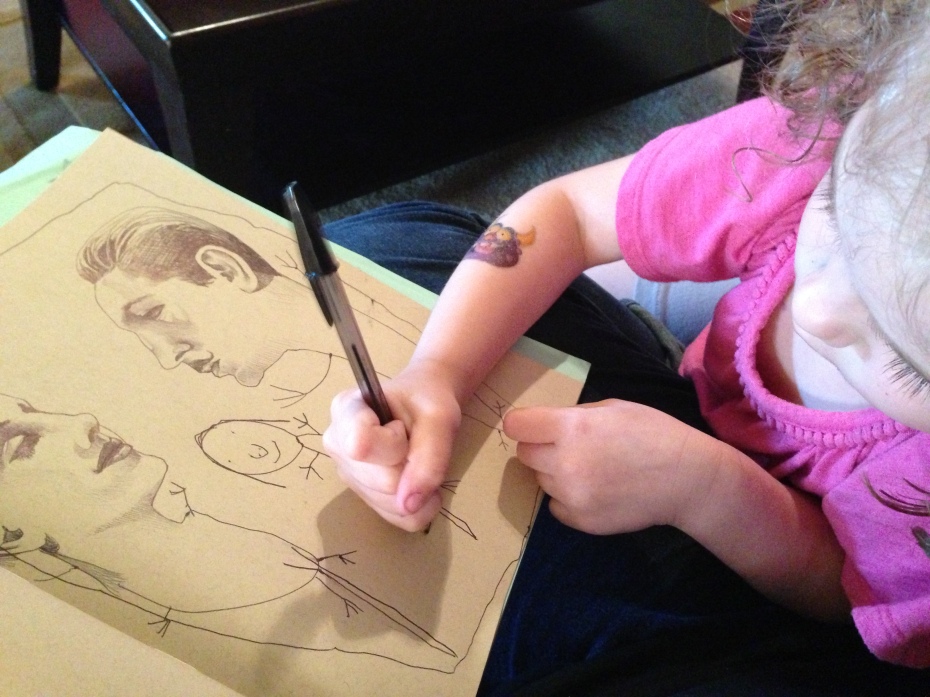
Something that inspired me, for a potential project this year, was this artist' blog about collaborating with her 4-year old daughter. I might need to do a project where I divide a sheet into parts and each child has like 5 minutes to draw something and then pass it along, hopefully building on each other's drawings in a fun surreal way??
For the Springtime and as study of Asian painting, I had the younger kids do a study of the plum blossoms, with black paint branches, pink tissue paper and green "celadon" paper vases.
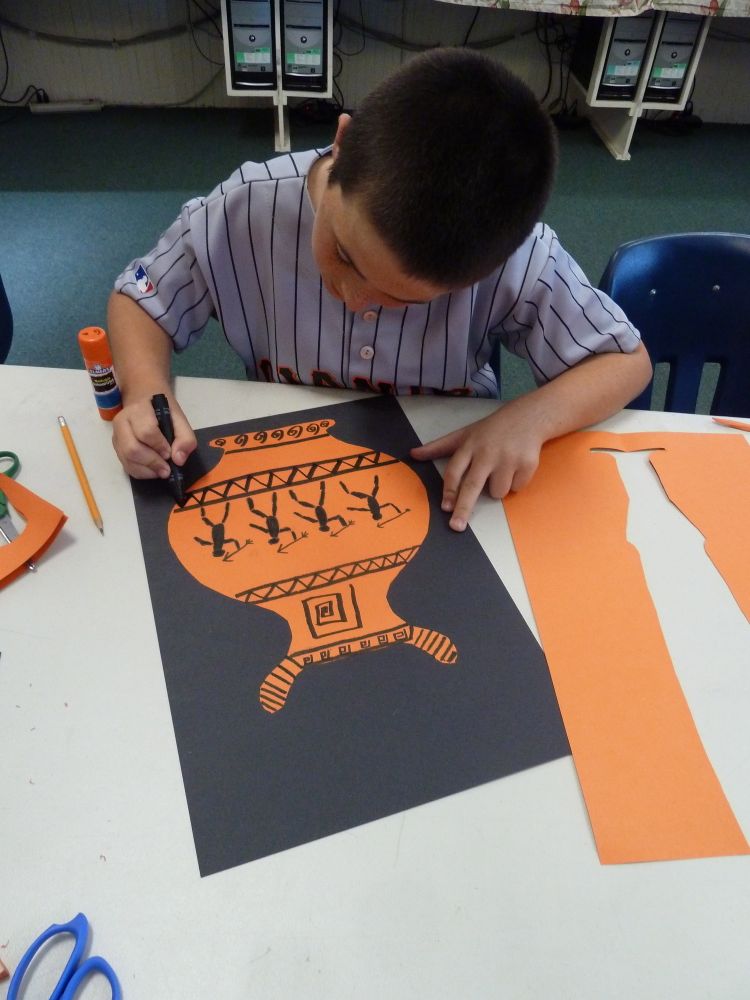
Another project that I did two years ago, this dovetails with the 5th-6th study of ancient Greece. The kids viewed some examples of the shapes and decorations of greek vases. Then they folded the orange paper in half and drew half the vase. I did not limit their shapes but did want them to put handles and base and top on it. Then they decorated with black marker to simulate repeating design and athletic figures.
This was a fun project that our other teachers did with the kids on a "Fun Friday." The results were too cute and artistic to not post here as well. Lots of fun combos of triangles!
I was inspired by projects that I have seen that involve doing two similar but opposite drawings and then slicing them and putting them on accordian-folded paper.
I told the kids about Andy Warhol and his many technicolor portraits of celebrities. I also walked them thru drawing a face. We had already done an eye earlier in the year. The next step was to photocopy their pencil drawing, so they would have identical copies, and also not ruin their nice pencil drawing.
Once they had the two faces, they used colored markers to color the different parts of the face. My goal was to have complimentary colors like green/red hair, blue/orange skin, purple/yellow eyes.
Then they had to fold/cut their portraits into 4 vertical strips, and alternate them on a larger piece of paper that could be accordian folded.
In a repeat of a project I did 2 years ago, I had the K-1 group make crosses for St. Patrick's Day. Tinfoil, pencils to emboss with, paint and some construction paper. The main concepts are pattern, and how to use paint to "antique" the metal. Fun and simple.
Being that its springtime now, and the kids have been learning about insects, I had the idea to do bees with the little kids.
This was a fun multi-step project that turned out great. I did explain a bit about the parts of a bee, and they used paper, paint, and some foam packing material for the wings.
I'm always amazed at how much personality the kids can put into their art. It is always much more charming and evocative than the sample I show them!
This project turned out better than I hoped. A few weeks ago, I had the kids paint 4 sheets of paper with dark-light versions of a color. Most people chose purple, blue or green. Those had to dry, so we picked it up a couple weeks later.
This lesson involved both color value and the idea of perspective and how distant objects are usually less complex looking and lighter. The kids had to layer their painted papers from light at the top to dark at the bottom. The way they chose to cut and overlap also had to attempt to get sharper and more complex shapes in the foreground and softer shapes in the background.
As I mentioned in my previous post, I am doing "stained glass" with all the kids for our European International study.
Before the lesson, I showed them this clip from Sister Wendy. It explained briefly about some English stained glass and tidbit of history.
The first step was to get clear plastic/acetate (report covers and sheet protectors work great for letter sized-but for larger ones I used large sheets of 5mil plastic from TAP)
I mixed up some white glue and water and then had the kids arrange small scraps of tissue paper on the plastic and really make sure that the paper was nice and wet and gluey. I let these dry, and made some black card-stock frames. Final touch was black sharpie marker to outline shapes and other details.
Every year, the school picks a geographic theme for their International Study. This year it is Europe (it usually is a continent or general area of the world) I try to do some art lessons that cater to that theme and also provide decoration for the annual "International Luncheon" where the parents bring in food from that region and they have a celebration.
For European art I did several things:
The younger kids make paper Dala Horse from Sweden. This was to emphasize, cutting, pasting and decorating. The real horses are wooden sculptures, but these were made from red and yellow tagboard, cut and then decorated in a folk art style.
The 2-4 grade did "coats of arms" shield that they made using elements that meant something to them or told a story. I told them about heraldry and the meanings of certain colors, shapes and symbols. They did this on paper bag paper to make them look old.
All the kids did "stained glass" which is a traditional European church/castle art form. We watched a quick Sister Wendy video on stained glass history and then the kids used tissue paper and white glue to collage the colors onto clear sheets of acetate. We will fame them in black tagboard in gothic and romanesque window shapes.